Showing posts with label Inspiration. Show all posts

Wednesday, February 20, 2013

Best Way To Clean A Microwave

I can hear my mother's voice everytime I open my microwave to heat something: "put a napkin over it so it doesn't get all over the place."  Ya, ya I say...but, of course, never do.  I actually hate to put anything over food i'm warming in the microwave for many reasons.

1.  Warmed napkins give off chemicals I don't need in my food.
2.  Napkins are expensive and i'm cheap.
3.  My hubby's method is to put a plate over food, but that's just another dish to wash.
4.  I'm really lazy...that's what it really comes down to. 

So, of course after a few months of heating food my way, my microwave looked pretty bad.  It was so bad, my hubby actually pointed it out..."what is that?".  Ya...pretty bad.  I'm also lazy, did I mention that already, so it's taken me forever to clean it, but after today, I had enough.

In comes pinterest and a post I came across on how to clean your microwave quickly and easily.  Apparently this is common knowledge...but I live under a rock.  The last time I cleaned my microwave, it took me almost 20 minutes of scrubbing, so I was willing to try anything quick and easy.

Here is what I did:
1.  Add 1 cup of white vinegar to 1 cup of hot water (in a pyrex bowl/measuring cup).
2.  Place it in the microwave and heat for 10 minutes.
3.  Remove the cup mixture carefully as it is extremely HOT.
4.  Quickly wipe down the guck with a sponge or rag.  You want to work fast so that the guck doesn't dry up, but if it does, just dip your rag in the leftover solution and wipe away.

Note: the water did explode in the microwave, but most of it steamed off so there wasn't a puddle to clean up.  You can place a wooden spoon in the bowl to prevent this from happening according to the post, but I didn't really care too much...actually I kept away from the microwave just in case :D  

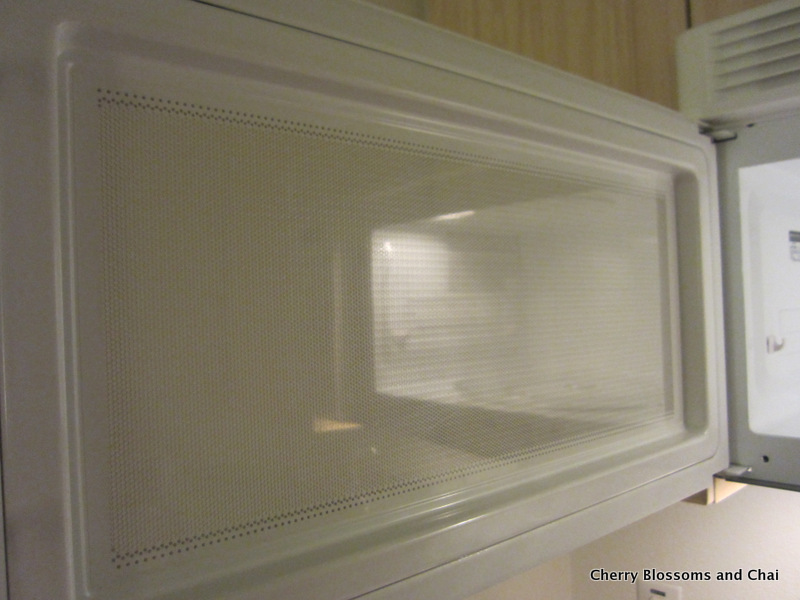
The cleanup was so fast, I was amazed.  It took me less than a few minutes to clean the entire microwave and inner door.
 I know mom...you're shaking your head.


 It's so beautifully clean, I could lick it!!!

Monday, February 4, 2013

DIY Anthropologie Inspired Hand Dotted Glassware

I was inspired by a recent pinterest post to try something I've wanted to buy for a very long time.  On numerous occasions I've been tempted to buy these Anthropologie settled confetti glasses, but I would have had to buy at least 4, and at about $8 a glass...it definitely was not going to be in my budget.  I also have a lot of cups, so space was an issue and I was also not too fond of the smaller size.  So, I decided to try doing something similar myself and see what happens.  I used some tall glasses that we have that are rarely used (we always use the shorter ones of the set). I figured worst case scenario, if I didn't like it, or it didn't turn out...no harm done.  I'm also picky and wanted something more unique and different, so I decided I would go for round dots rather than oblong strokes as seen in this post.


 Here is what you will need to paint your own glassware :)
  • Glassware (of any kind)
  • Acrylic Enamel Paint - I bought primary colors (red, yellow, blue, and white) of the Martha Stewart brand
  • Rubbing Alcohol
  • Cotton Balls
  • Q-Tips (with cotton removed)
  • Paint Palette (an un-used cutting board in my case)
  • Sheet Pan
  • Parchment Paper
Note: I would recommend maybe wearing a mask if you're painting indoors as the smell might bother some people.  It definitely gave my the sniffles after I was all done.

You can use primary colors to make any color you want. Use this chart to help make a combination of different colors:

Red + Yellow = Orange
Yellow + Blue = Green
Blue + Red = Violet
Red + Orange = Red-orange
Yellow + Orange = Yellow-orange
Yellow + Green = Yellow-green
Blue + Green = Blue-green
Blue + Violet = Blue-violet
Red + Violet = Red-violet  
 I bought colors in high gloss as I wanted some shine, but they didn't have red in high gloss, so I had to settle for a satin finish (you can't tell the difference!).

 I was looking for a 'semi-perfect filled in round dot' look, which I knew I couldn't get with a paint brush or toothpick, so I opted for a Q-tip with the cotton removed.  It worked well for the look I was trying to get.

1. Prior to painting your glassware, make sure to wipe the area intended to paint with rubbing alcohol. Avoid leaving fingerprints.  
2. Apply one color at a time starting from the bottom and moving around the glass. Adding one color at a time allows you to make sure you get an even look, filling in colors where you need to. 
3. Avoid painting around the rim of the glass just to be safe.  The paint is supposed to be toxic free, but better to be safe than sorry. 
4. Also, make sure to press down on the paint while applying the dots to make sure you don't have a tip sticking out.  When the paint hardens, it can be pretty sharp.

It took me about 2 hours to do 6 glasses.  I was only going to do 2, but I started to really like the look :)
5. Place the glasses on your sheet pan covered in parchment paper (to save your pan just in case the paint drips...it shouldn't).  
6. Allow the paint to dry for 1-2 hours.
7. Place the glasses in an oven, turn up the heat to 350C with the glassware inside (you don't want to place cool glasses in a hot oven or they might break/shatter/crack).
8. Heat for 30 minutes.
9. Allow them to cool in the oven for a few hours (at least 1 hour) before removing.  
An alternative is to allow the glasses to cure for 21 days, but baking works just as well according to many reviews I read about the paint and I was in a hurry to see the final product :)
I really like my new cups and I'm considering doing this to the rest of them.  According to the paint label, you can wash these glasses in the top rack of a dishwasher, so let's see how they hold up!


Monday, January 21, 2013

Gift Box Set - Bridal Shower Idea

What do you get a girl who has everything for a bridal shower gift? Here is my idea for a  gift set that could really work for any situation.

It was hard to find the right gift, something that was useful and cute and at the same time appropriate.  I wasn't ready to get some scandalous something a rather for someone I didn't know too well, especially since they really didn't want it (not the right place and time to embarrass a friend) and I knew she was going to get TONS of that stuff anyways.  I also didn't want to get the usual bath accessories or candles or anything of that sort, as most of the time you get tons of that stuff and the fragrance that you may like may not be what they like.  I considered getting a pretty picture frame, but I kind of had this feeling she would be getting one (and I was right!!).  So, I put my thinking cap on (and I do have to give my mommy some credit for this idea), and decided to get her a mix of little things that included stationary, because you just can't ever have enough.

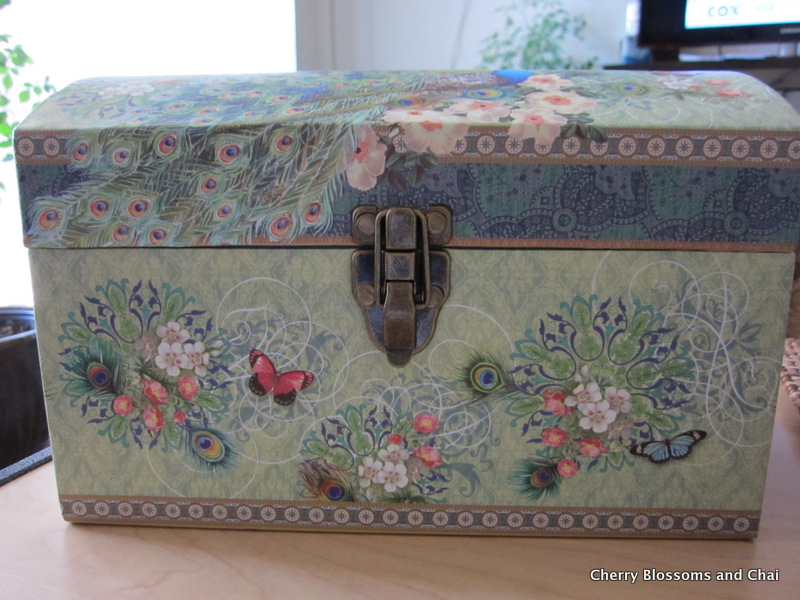
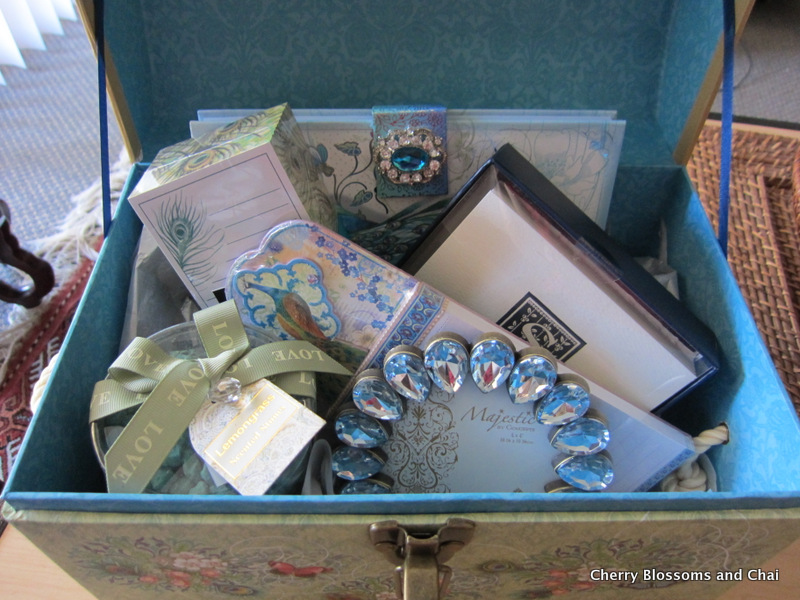
So, here is what I put together.  I actually loved my gift (which is always a good sign) and would have kept the box because it totally matched my peacock pillow (which my husband was ready to wrap along with this gift...meany), but alas...it had to go to its new home.

Stationery with her and her hubby's first initial (such a coincidence, yay!). A magnetic writing pad for the fridge, a notebook/diary, mini desk notepad, matching bling frame (i'm all for rhinestones) and really good smelling stones which were to die for, and I put all of this in an adorable box with white and silver tissue paper.


Monday, August 20, 2012

Armoire Makeover

I love before and after projects.  This armoire makeover is one of those amazing DIY projects that really gets me excited.

BEFORE

AFTER

I love the color and I love how everything has it's own place.  I think, if and when we move, an armoire for a desktop computer is great, assuming the hubby agrees, since the desktop computer will probably be his :D (I promise not to put out pink accessories on your desk).  The bright interior is not only soothing, but the fact that you can close up the space when you need to, to hide the mess, is one of the best things about an armoire.  That way, when you have guests, you don't have to run around cleaning up the desk, stuffing papers away that you won't be able to find later.  Brilliant idea!

Tuesday, June 19, 2012

Hijabi Figure Skater

When I was younger I used to figure skate.  I don't think I was ever that good, but I loved it.  I couldn't wait to get to the rink.  I would count the minutes until I could get there.  When I would open the doors, and run down the stairs, my heart would be pounding until I could see the rink and feel the cold on my face.  I would impatiently wait in line till the doors would open, counting the seconds until I could lace up my skates and fly across the ice.  My parents never had the money to really put me through lessons, so all that I learned was from my mom (she used to skate) or from watching people.  My summers consisted of living at the ice rink.  Any chance I got, I would make my mom take us (my brother always came too).  I was getting good (so I think), but all great things come to an end.  College started (and I chose an education instead...psht) and I had a bad fall on the ice and well, life goes on.  I always dreamt of some day becoming a professional figure skater.  Deep down, I still do.  

It's been such a long time since i've been on the ice.  I think it's about time I get back on :) its been years since my injury and well...I think it would do me good :) Now, where are my skates?

I came across this awesome interview of Zahra Lari, a 17 year old girl from the gulf who, wait for it...wait for it (well, you've already seen the picture)...is a hijabi figure skater.  WOAH!  When I saw her picture, I was just amazed.  Most people may not think its a big deal, but when you dream of doing what she's doing and then you see her compete in hijab...well its amazing.  She competed in the European Cup and finished in the top 15 (if you ask me, that's awesome).  She hopes to some day compete in the 2014 winter Olympics.  I am so in awe of her.  I wish I could have had the opportunity to do something like this.  I'm rooting for her and really hope that I get to see her at the Olympics.  You make other hijabi girls dreams come true Zahra :) Way to go!


Wednesday, May 9, 2012

Closet Inspiration

A nice walk-in closet would be amazing.  I could do so much with a nice closet.

I have a confession to make.  I have too much stuff.  Living in a small apartment really is hard when you have too much STUFF.  I used to be so organized (I still am sometimes), but lately its just too hard to put things back because everything is so crammed and stuffed in small spaces.  My closet for instance is in need of a major overhaul.  It is so packed with clothes, purses and STUFF, that I can't find anything that I need and I don't bother putting things away because its too difficult.  I don't know how my husband turns a blind eye to it.  If I were him, I would have had it with me.  I'm tired of stuffing things and I know I own to much (I can't help it...school makes me shop).  I am planning on making time this weekend to really get in there and get rid of things I don't need/wear to make more room, so I don't have to stuff things away any longer (hopefully not make room for more things that I am not planning on buying).  I know I'm going to end up sending things back with my parents when they visit, haha...but I really need to try not to do that and just get rid of it.  If I haven't worn it in the last few years...its out (I say that, but it never happens).

How do people do it with small spaces?


My dream closets.  Some day...sigh...
 Carrie Bradshaw's apartment 


Apartment Therapy


What a great idea! Wish I had the room!

Monday, April 16, 2012

Creative Knits

I am working on my fourth shawl at the moment. It is a black shawl with a lace-like pattern.  Why black you may ask (you and everyone else I've told)?  Black because I wanted something to match my black coat (in particular when I go to the mosque and need something black for an occasion that requires black) and I couldn't find a nice black shawl that I liked.  But, unfortunately, I can't seem to make the time to sit and knit.

Knitting was supposed to be a hobby and really more for stress-relief, something to pass the time away while watching TV (I can't just sit and watch TV, I get bored really fast) but every time I sit to knit, it is one of the most stressful experiences I have ever had!  I get so frustrated when the stitches don't look just right and of course (being a newby) I add a stich, or lose a stich (I am forever losing stitches) or just lose my place in the pattern and 10 rows later realize it.  So, I pull it all out and start again or if I can for the life of me figure out how many stitches too pull off to return to a place I can manage to start from, I will be very lucky and not have to start from scratch. So alas, knitting is not for me what it is for most people.  I start something and force myself to finish it just because I get tired of looking at my knitting bag sitting in the corner with a half finished project.  Once I finish I get so excited that I made something nice that I start a new project and the cycle of frustration and annoyance continues.    

So, whenever I see knitted items, I get all excited and make a list of items I am eventually going to make (like I am now) and then I realize the above.  Arg!


I totally want something like this! It's the perfect bag for my knitting stuff! :)

 Apples get cold too you know!!


For the men, desperate to grow facial hair!  Look no further!


LinkWithin

Related Posts Plugin for WordPress, Blogger...