Showing posts with label Cleaning. Show all posts

Monday, July 1, 2013

DIY Cord Organizer

I hate messy cords (well anything messy really) and I hate not being able to ever find a cord that I need, when I need it. Our cords were spewed across various drawers and I just couldn't take it anymore. I decided that it was time to organize the cords (chargers for kindle, ipod, external hard drives....) all into one nice and neat box.

Oh, it brings tears to my eyes...it's so organized!

All you need:
A box (mine is 8" x 8") or any size box that will store all your cords
Cardboard box to cut into size as inserts
Pretty paper
Ruler
Glue/tape
Scissors
 My nice little box


I cut 3 inserts from a cardboard box to make 6 slots in the box.
 All inserts were 4.5" high x 8" wide. Cut 2 slits into all three pieces so that they fit into each other nicely.

Cover with pretty paper or cardstock.

 Fit into the box like so... 

 Organize your cords from this:
To this:

and....Voila...a beautiful masterpiece of organization!

All nicely put away on the shelf for use when needed.

I used these velcro self gripping strips/cable ties to organize the cords. A packet of 100 (comes in a total of 4 rolls) was $7 on Amazon and they're reusable and work for all shapes and sizes of cords. They're wonderful...I've already used one roll on all the things I could find in the house that could use wrapping.

They are pre-cut 8" long strips that come on a roll. You just need to peel off a piece and you're good to go.

Happy Organizing!

Wednesday, February 20, 2013

Best Way To Clean A Microwave

I can hear my mother's voice everytime I open my microwave to heat something: "put a napkin over it so it doesn't get all over the place."  Ya, ya I say...but, of course, never do.  I actually hate to put anything over food i'm warming in the microwave for many reasons.

1.  Warmed napkins give off chemicals I don't need in my food.
2.  Napkins are expensive and i'm cheap.
3.  My hubby's method is to put a plate over food, but that's just another dish to wash.
4.  I'm really lazy...that's what it really comes down to. 

So, of course after a few months of heating food my way, my microwave looked pretty bad.  It was so bad, my hubby actually pointed it out..."what is that?".  Ya...pretty bad.  I'm also lazy, did I mention that already, so it's taken me forever to clean it, but after today, I had enough.

In comes pinterest and a post I came across on how to clean your microwave quickly and easily.  Apparently this is common knowledge...but I live under a rock.  The last time I cleaned my microwave, it took me almost 20 minutes of scrubbing, so I was willing to try anything quick and easy.

Here is what I did:
1.  Add 1 cup of white vinegar to 1 cup of hot water (in a pyrex bowl/measuring cup).
2.  Place it in the microwave and heat for 10 minutes.
3.  Remove the cup mixture carefully as it is extremely HOT.
4.  Quickly wipe down the guck with a sponge or rag.  You want to work fast so that the guck doesn't dry up, but if it does, just dip your rag in the leftover solution and wipe away.

Note: the water did explode in the microwave, but most of it steamed off so there wasn't a puddle to clean up.  You can place a wooden spoon in the bowl to prevent this from happening according to the post, but I didn't really care too much...actually I kept away from the microwave just in case :D  

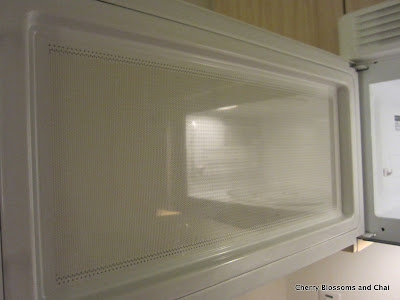
The cleanup was so fast, I was amazed.  It took me less than a few minutes to clean the entire microwave and inner door.
 I know mom...you're shaking your head.


 It's so beautifully clean, I could lick it!!!

Wednesday, February 6, 2013

Cleaning Your Washing Machine

Over the past year I'd noticed there was a rim of black around the top of my washing machine. I don't know if it was dirt, grime, or just stained, but it was starting to look pretty bad and embarrassing. I was inspired to clean it after reading this post.

It took a few hours, but here are the steps.

1.  Using a magic eraser, clean the stains around the rim of the washing machine.
2.  Fill the washing machine with HOT water.
3.  Add 4 cups of bleach, allow to agitate for a few minutes, then allow to sit for 1 hour.
4.  Allow the machine to run through it's longest cycle.
5.  Fill the machine with HOT water again immediately.
6.  Add 4 cups of white vinegar and allow to agitate for a few minutes, then allow to sit for 1 hour again.
7.  Run the longest wash cycle again.
8.  Rinse the machine with HOT water for one 1/2 cycle to complete.
  A clean and happy washing machine :o)

LinkWithin

Related Posts Plugin for WordPress, Blogger...