Monday, February 11, 2013

Weekend Fun

I had to take my lappy to the doctors (aka Apple store) to get it checked for excessive snail like behavior.  While there, I took advantage of being at the mall :D haha...woohoo.
iPhone accessories...oh the love.

:) Hi mommy!

A craft idea in the making :)


Anthropologie door/drawer knobs...ideas in the making!! :D

 These tiles were so beautiful!

$148 for a mirror??

Oh the colors!

 See my new bangle :D 

This store is a definite must for any olive oil, vinegar lover...that's all I'm going to say for now!  But, notice the blue sky, while the rest of the country is freezing and under snow, we're enjoying lovely (albeit cold) weather...not bragging...I swear!

Friday, February 8, 2013

Freshly Squeezed Orange Juice

I've been sick all week, again times 3.  What is with this flu season geez!  It keeps coming back.  It's a horrible cycle.  So, with this cold comes my usual cravings: chocolate, toast and orange juice.  Wonderful combination if you ask me :)

I bought a BIG bag of oranges and squeezed about 15 of them.  The oranges were super sweet and the juice felt good in mah belly :D

I love my little Oster juicer :) It's so cute!

 I love the pulp, so I make sure to add it to the juice.

 Orange juice in my super cute handmade polka dot glasses :)

Happy Friday Everyone!

Thursday, February 7, 2013

White Chocolate Chip Cookie Brittle

I've had a crazy sweet tooth this week and was dying for something uber chocolatey.  Here's a recipe for some white chocolate chip cookie brittles.  They come out crunchy and pretty yummy.

Ingredients
*makes about 48 cookies
  • 1 cup (2 sticks) of softened butter
  • 2 cups sugar
  • 2 eggs (room temperature)
  • 2 tsp vanilla extract
  • 2 cups all-purpose flour
  • 3/4 cups dutch processed cocoa powder
  • 1 tsp baking soda
  • 1/2 tsp salt
  • 2 cups (12-oz. pkg.) White Chocolate Chips
  1. Heat the oven to 350°F.
  2. Beat the butter and sugar in a large bowl until creamy. 
  3. Add the eggs and vanilla and beat until light and fluffy. 
  4. Stir together the cocoa, flour, baking soda and salt and add to butter mixture.
  5. Stir in the white chips until mixed well.
  6. Roll a rounded teaspoon of cookie dough in your hand and place onto a cookie sheet.
  7. Bake about 7-8 minutes.
  8. Cool on a wire rack.
 Note: They will be puffy while baking but once you take them out, they will flatten and get crunchy upon cooling. 

Bon Appetit :)

Wednesday, February 6, 2013

Cleaning Your Washing Machine

Over the past year I'd noticed there was a rim of black around the top of my washing machine. I don't know if it was dirt, grime, or just stained, but it was starting to look pretty bad and embarrassing. I was inspired to clean it after reading this post.

It took a few hours, but here are the steps.

1.  Using a magic eraser, clean the stains around the rim of the washing machine.
2.  Fill the washing machine with HOT water.
3.  Add 4 cups of bleach, allow to agitate for a few minutes, then allow to sit for 1 hour.
4.  Allow the machine to run through it's longest cycle.
5.  Fill the machine with HOT water again immediately.
6.  Add 4 cups of white vinegar and allow to agitate for a few minutes, then allow to sit for 1 hour again.
7.  Run the longest wash cycle again.
8.  Rinse the machine with HOT water for one 1/2 cycle to complete.
  A clean and happy washing machine :o)

Tuesday, February 5, 2013

Best Ice Cube Tray Ever

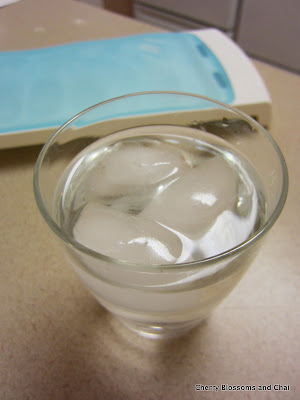
If you remember from a while back, I had mentioned that we have space "issues" with our fridge, especially the freezer (but really, who doesn't).  There is an ice cube maker built into our freezer that works when it feels like it (that is, never), but that also takes up a ton of space that could be used more efficiently. So, we decided we could forgo ice for space and make do with cold water (minus the ice) with the slim fridge water jug, but the hubs still wanted ice.  So, he finally found an awesome product that worked with our main problem: having ice cube trays lay flat, just doesn't work when you're lacking in space.  But, welcome the best ice cube tray i've ever seen that actually works - OXO Good Grips Ice Cube Tray.

You can lay it/place it at pretty much any angle (except vertical) and it won't leak.  Just fill it with water, slide the silicone lid across the top, pour off the excess water by holding the tray at a slight angle, and put away to freeze.  LOVE IT!
 The blue silicone lid slips on and with the help of water friction or as they call it, "ergonomic grips" prevents water from leaking.  It's awesome!!  I hope it lasts the test of time, but so far, it's been great!!
 

 Slight twist of the tray is all you need to release the ice. 

 YAY FOR ICE!!


Monday, February 4, 2013

DIY Anthropologie Inspired Hand Dotted Glassware

I was inspired by a recent pinterest post to try something I've wanted to buy for a very long time.  On numerous occasions I've been tempted to buy these Anthropologie settled confetti glasses, but I would have had to buy at least 4, and at about $8 a glass...it definitely was not going to be in my budget.  I also have a lot of cups, so space was an issue and I was also not too fond of the smaller size.  So, I decided to try doing something similar myself and see what happens.  I used some tall glasses that we have that are rarely used (we always use the shorter ones of the set). I figured worst case scenario, if I didn't like it, or it didn't turn out...no harm done.  I'm also picky and wanted something more unique and different, so I decided I would go for round dots rather than oblong strokes as seen in this post.


 Here is what you will need to paint your own glassware :)
  • Glassware (of any kind)
  • Acrylic Enamel Paint - I bought primary colors (red, yellow, blue, and white) of the Martha Stewart brand
  • Rubbing Alcohol
  • Cotton Balls
  • Q-Tips (with cotton removed)
  • Paint Palette (an un-used cutting board in my case)
  • Sheet Pan
  • Parchment Paper
Note: I would recommend maybe wearing a mask if you're painting indoors as the smell might bother some people.  It definitely gave my the sniffles after I was all done.

You can use primary colors to make any color you want. Use this chart to help make a combination of different colors:

Red + Yellow = Orange
Yellow + Blue = Green
Blue + Red = Violet
Red + Orange = Red-orange
Yellow + Orange = Yellow-orange
Yellow + Green = Yellow-green
Blue + Green = Blue-green
Blue + Violet = Blue-violet
Red + Violet = Red-violet  
 I bought colors in high gloss as I wanted some shine, but they didn't have red in high gloss, so I had to settle for a satin finish (you can't tell the difference!).

 I was looking for a 'semi-perfect filled in round dot' look, which I knew I couldn't get with a paint brush or toothpick, so I opted for a Q-tip with the cotton removed.  It worked well for the look I was trying to get.

1. Prior to painting your glassware, make sure to wipe the area intended to paint with rubbing alcohol. Avoid leaving fingerprints.  
2. Apply one color at a time starting from the bottom and moving around the glass. Adding one color at a time allows you to make sure you get an even look, filling in colors where you need to. 
3. Avoid painting around the rim of the glass just to be safe.  The paint is supposed to be toxic free, but better to be safe than sorry. 
4. Also, make sure to press down on the paint while applying the dots to make sure you don't have a tip sticking out.  When the paint hardens, it can be pretty sharp.

It took me about 2 hours to do 6 glasses.  I was only going to do 2, but I started to really like the look :)
5. Place the glasses on your sheet pan covered in parchment paper (to save your pan just in case the paint drips...it shouldn't).  
6. Allow the paint to dry for 1-2 hours.
7. Place the glasses in an oven, turn up the heat to 350C with the glassware inside (you don't want to place cool glasses in a hot oven or they might break/shatter/crack).
8. Heat for 30 minutes.
9. Allow them to cool in the oven for a few hours (at least 1 hour) before removing.  
An alternative is to allow the glasses to cure for 21 days, but baking works just as well according to many reviews I read about the paint and I was in a hurry to see the final product :)
I really like my new cups and I'm considering doing this to the rest of them.  According to the paint label, you can wash these glasses in the top rack of a dishwasher, so let's see how they hold up!


LinkWithin

Related Posts Plugin for WordPress, Blogger...