
My idea: etching flower patterns onto the glass. Yes, cause I have nothing better to do with my time :D

Here's what you will need:
- Armour Etch - etching cream
- Sponge brush - any brush will work
- Stencils - I used Martha Stewart Blossoms
- Rubbing alcohol (isopropyl alcohol)
- Gloves - optional, but this stuff is toxic
- Painters tape - optional, but good to tape off areas you want to prevent etching
Directions:
- Clean the glass with rubbing alcohol to remove any fingerprints and dust.
- Apply the stencil. I had sticky stencils so it made life a bit easier. I used two separate stencils and applied them separately.
- Mix the bottle of etching cream well.
- Apply Armour Etch carefully with the brush (avoid drips). Be careful not to get any on the outer edge of the stencil. This was hard. I should have just taped the edges.
- Leave the etching cream on for 5 minutes. The directions said no longer than 1 minute, but that didn't do anything, so I left it on for 5-6 minutes. It was enough time.
- Wash off in the sink with luke warm water. Remove all the cream.
- Remove the stencil carefully. Add the second stencil and repeat steps 3-6.
- Voila, you have an etched cup :)


I used two of the brushes to hold the cup from rolling.
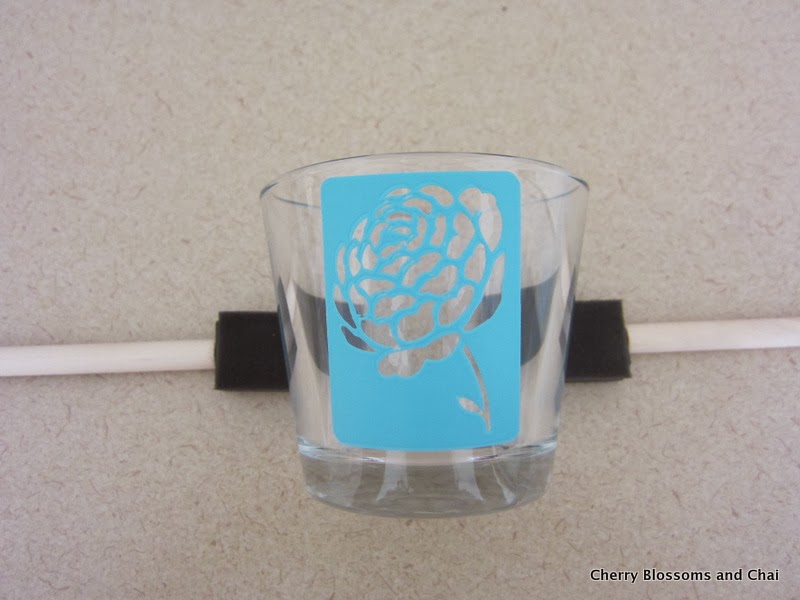
Apply the cream to make sure you cover every inch of the stencil. The more the merrier. As you can see, the cream was very close to the edge of the stencil. This is why I say, tape the edges with painters tape. I didn't have any and was too lazy to go buy some. Tsk tsk!

One stencil down...one more to go...

I would do one stencil at a time. I wanted them close together and I also didn't want to fuss with cream running off the edge of the stencil because of the curvature of the cup.

It's hard to see, but it looks fabulous, if I do say so myself :D


Yay!!! I really like them. So, now onto the real tea glasses. 0 down, 12 to go.
No comments:
Post a Comment